
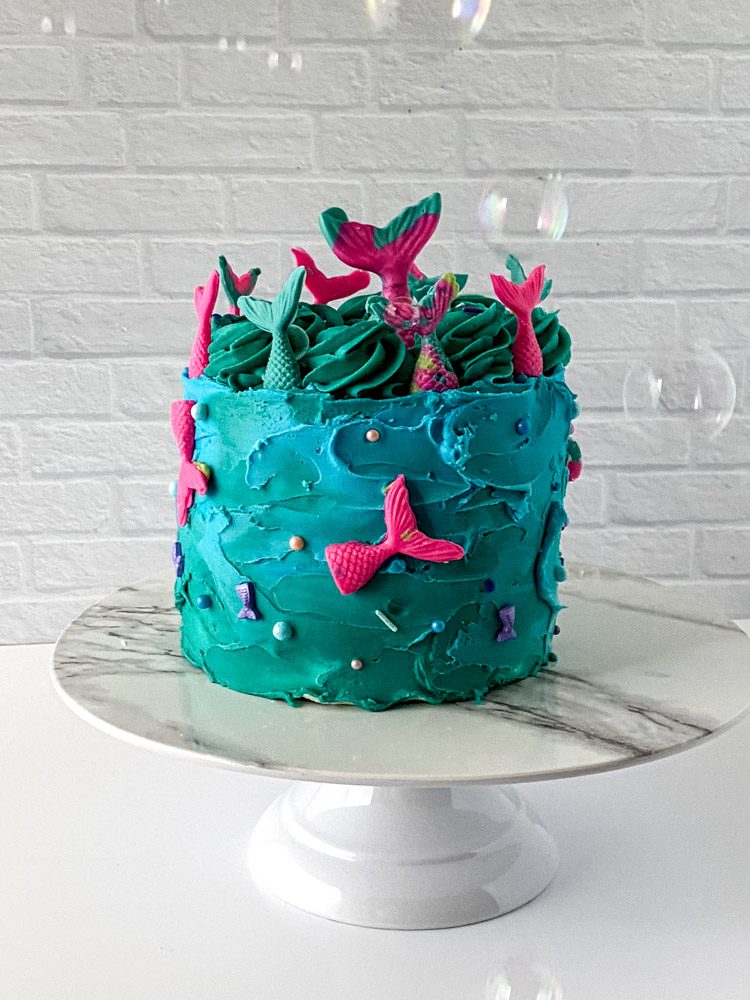
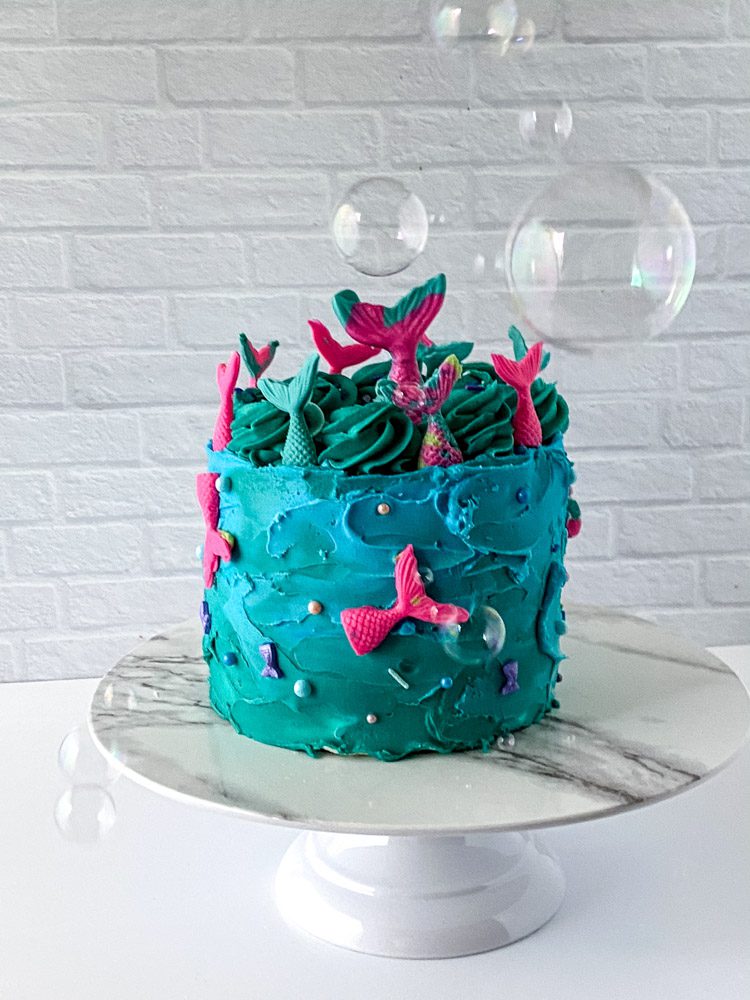
Step up your next birthday party with this do-it-yourself Mermaid Tail Cake! This buttercream mermaid cake is made so simple with your favorite boxed cake mix, fluffy buttercream, and some homemade chocolate mermaid tails.
Mermaid Tail Cake
I’m not a cake artist, but I do love making my kids’ birthday cakes! And this Mermaid Tail Cake is perfect for my mermaid-loving daughter!
I really do have way too much fun making birthday cakes for my family. Seeing my kids’ excitement when I wheel out a cake of my own creation is the best feeling ever!
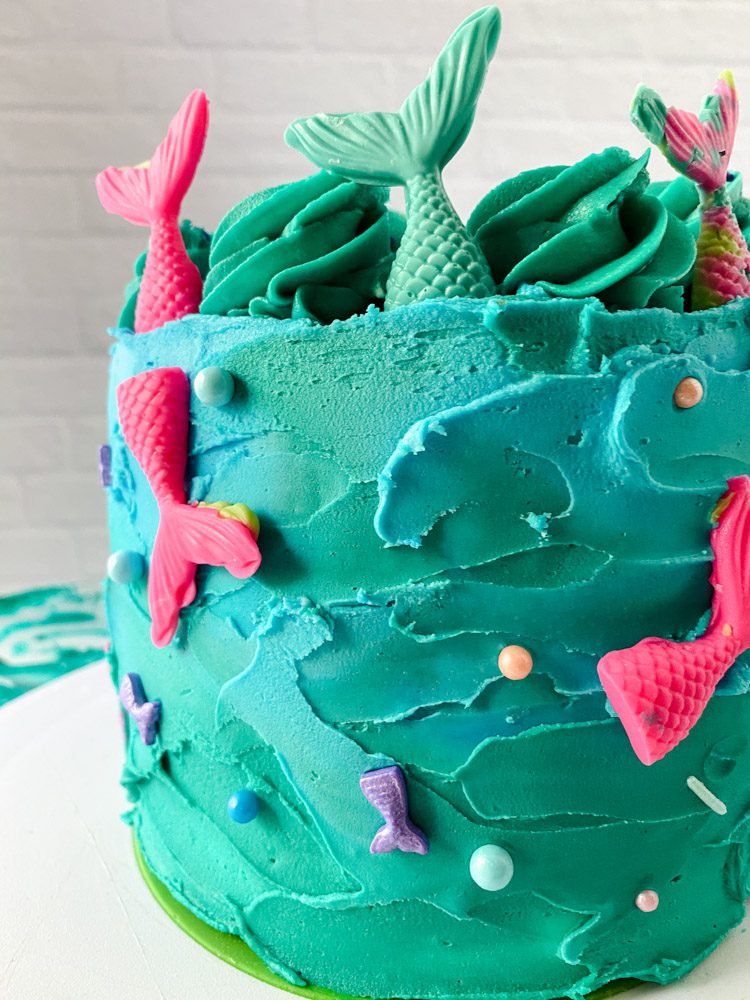
And let me tell you, this buttercream mermaid cake is a total showstopper! My daughter was beaming at the cute blue and green waves with mermaid tails all over. And I think her jaw hit the floor when I cut into it and she saw the swirls in the cake!
You wouldn’t believe it started as just a boxed cake mix and some buttercream.
If you have a mermaid party coming up, you need to make this mermaid tail cake! And for a mini-sized mermaid treat, you will definitely want to check out my mermaid cupcakes too!
More mermaid recipes you’ll love
- DIY Chocolate Mermaid Cake Topper
- Mermaid Lemonade Mocktail Recipe
- Super Simple Mermaid Rice Krispy Treats
Buttercream Mermaid Cake
This mermaid tail cake is just what you need! It won’t take too much time and looks so perfect at a mermaid party.
Ingredients
For the Cake
- 1 box white cake mix
- 3 eggs
- ⅓ cup vegetable oil
- 1 cup water
- 1 drop teal gel food coloring
- 1 drop electric blue gel food coloring
For the Decorations
- Vanilla buttercream, store bought or homemade
- Chocolate mermaid tails
- Mermaid sprinkles
The Following Tools Will Be Helpful When Making These!
How to Make a Mermaid Tail Cake
Don’t forget to download the full printable recipe below so you can print it out and use it whenever you feel like making this delicious recipe!
- To make a mermaid tail cake, start by preheating your oven to 350 degrees.
- Prepare your baking pans by spraying them well with nonstick cooking spray. Set the pans aside.
- In a mixing bowl, mix together your cake mix, eggs, oil, and water until combined.
- Remove about 1 cup of cake batter into a small bowl and 1 cup into another small bowl.
- Color each small bowl of batter blue or teal, using about 1 drop of gel food color into each.
- Place the blue and teal batters into individual piping bags and set each aside.
- Pour about half of the uncolored cake batter evenly into the two prepared cake pans.
- Use the piping bags to add the colored batters, making rings on top of the plain batter.
- Add the other half of the uncolored batter on top of each pan.
- Bake the cakes for about 30 minutes in the preheated oven or until a toothpick inserted into the center comes out clean.
- Let the cakes cool for about 30-40 minutes on the counter, then place them in plastic wrap in the freezer for at least 2 hours.
- When you are ready to decorate, start by placing your first layer of cake on a cake board and topping it with a layer of buttercream.
- Place the other layer of cake on top.
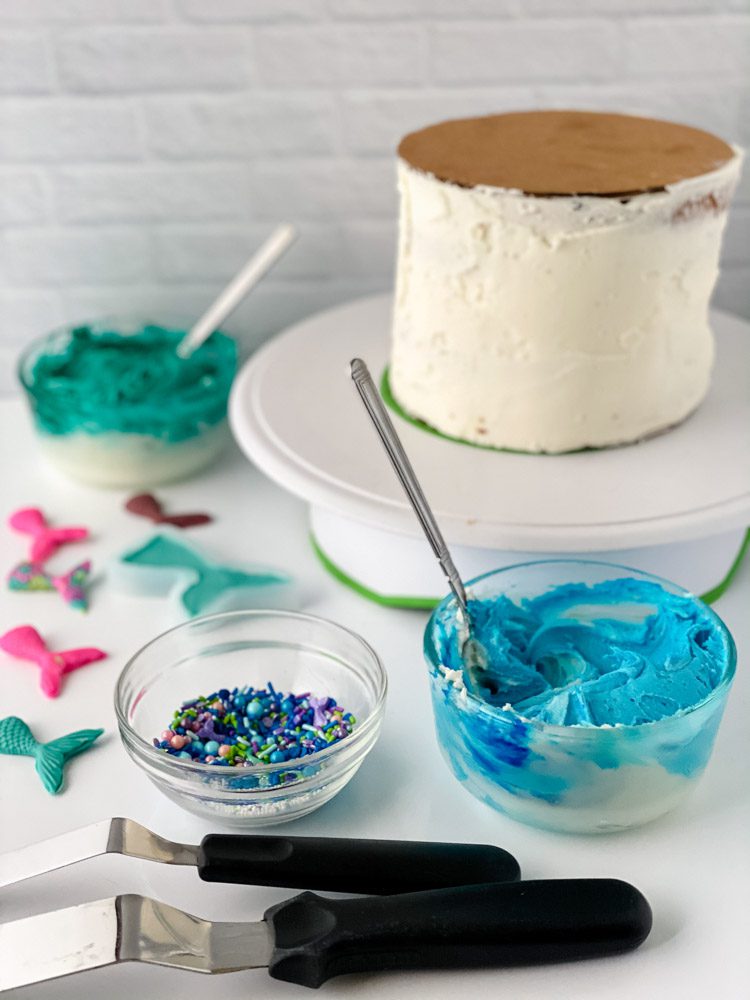
- Crumb coat the cake by adding a thin layer of buttercream to the entire outside of the cake.
- Place the cake in the fridge to chill for about 10 minutes.
- Use the gel food coloring to dye about 2 cups of the buttercream blue and 2 cups of the buttercream teal.
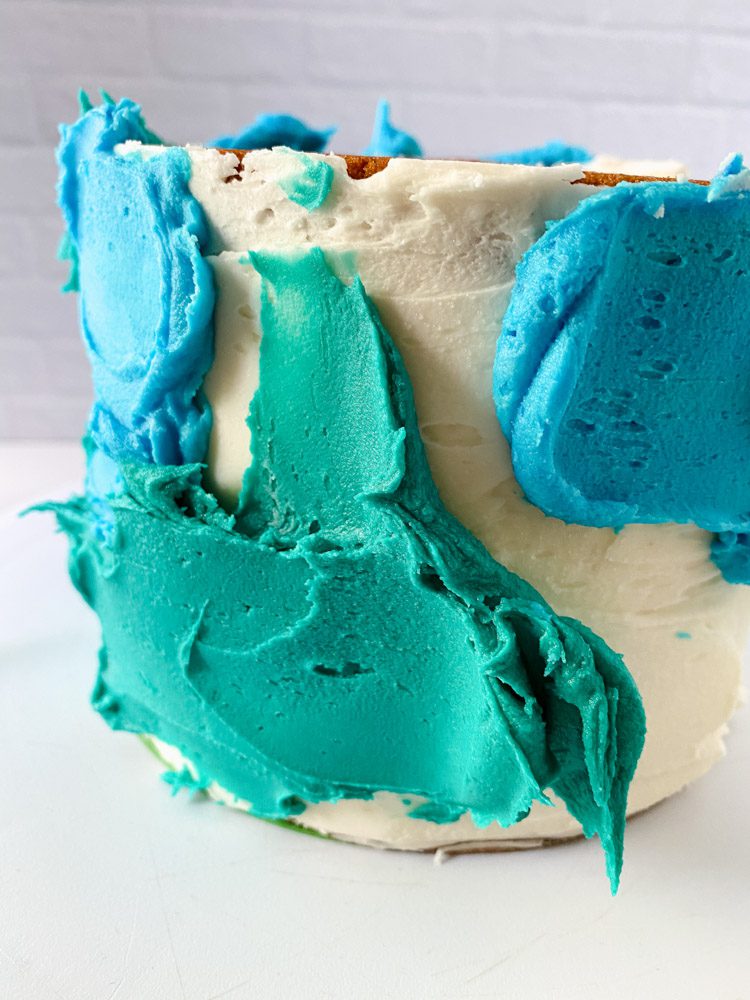
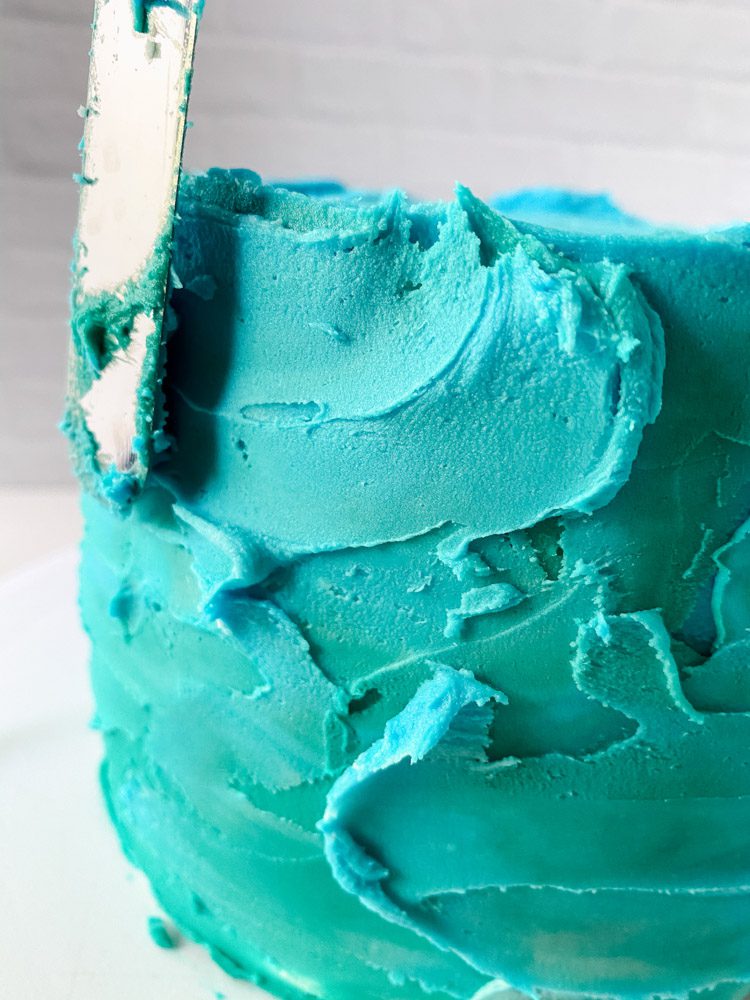
- Use an offset spatula to spread the two colored buttercreams all around the crumb-coated cake.
- Try to create imperfect waves by using the spatula to do quick upward or diagonal strokes.
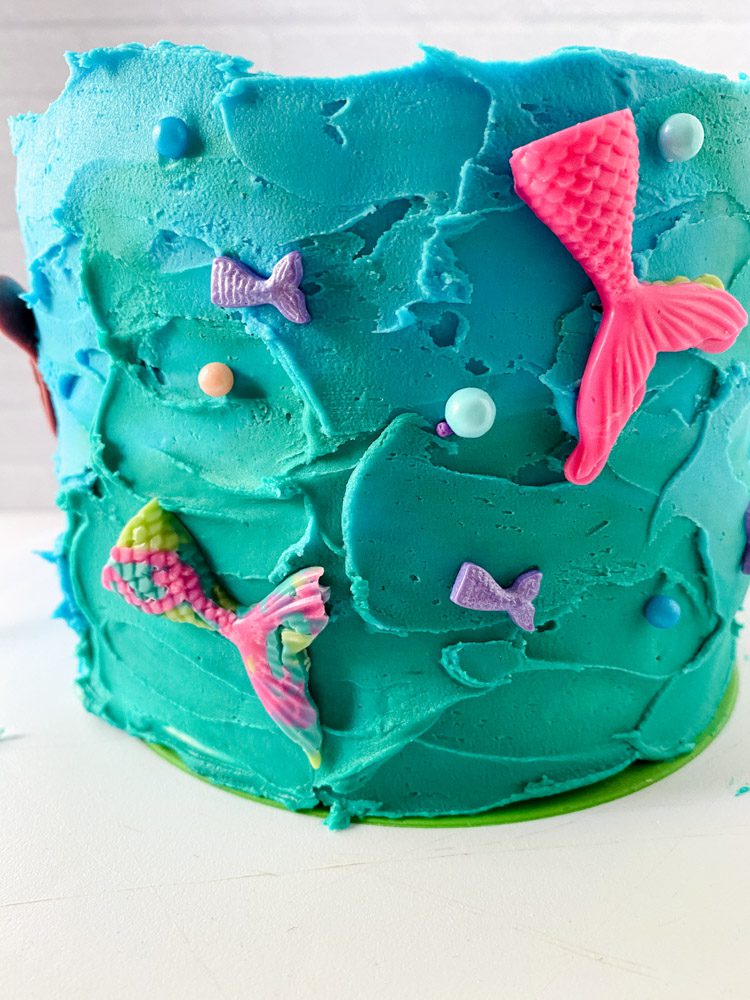

- While the buttercream is still setting, add the chocolate mermaid tails and sprinkles all around the cake.
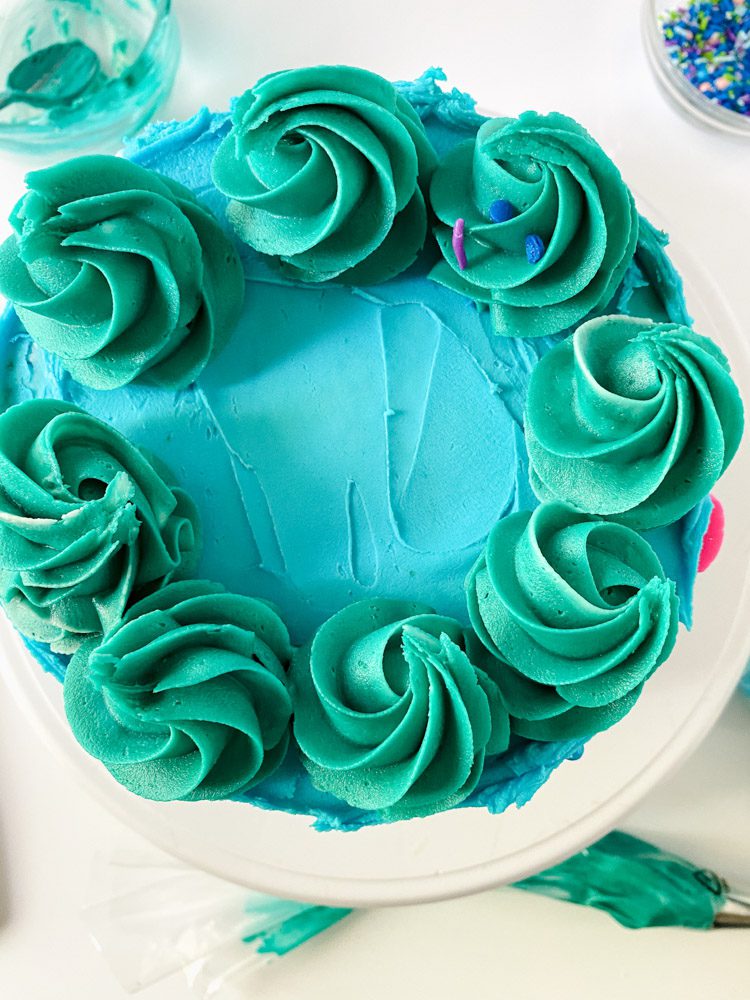
- Place the leftover frosting in a piping bag with a 1M tip and pipe 8 rosettes around the outer part of the top.
- Top the rosettes with sprinkles and more mermaid tails and your mermaid tail cake is ready to go!

Tips Tricks and FAQs
- I decided to make each layer of cake swirled with either blue or teal, but you can do the same technique with any color combination that you want. Try swirling both colors in each cake layer, adding more colored batter or less, or mixing the batters in different patterns. Let me know which technique is your favorite?
- It’s fine if the top of your cake has a little dome on it. It should even out with the buttercream layer! But if you think the dome is too large to stack relatively evenly, you may want to trim a bit of cake off the top. The best way to do this is by trimming it with a serrated knife before placing it in the freezer!
- You’ll want to keep your decorated cake in a room temperature location that is preferably less than about 73 degrees. If it’s too hot, you risk the buttercream melting and the layers of the cake getting wobbly. If it’s too cold you can get condensation on the decorations. Cakes can be tricky, but if you keep this cake at room temperature you should be just fine!
Storage
Store any cake leftovers in an airtight container in the fridge for up to 4 days.
More Easy Recipes
Did you make this?

Mermaid Tail Cake
Step up your next birthday party with this do-it-yourself Mermaid Tail Cake! This buttercream mermaid cake is made so simple with your favorite boxed cake mix, fluffy buttercream, and some homemade chocolate mermaid tails.
Ingredients
- 1 box white cake mix
- 3 eggs
- ⅓ cup vegetable oil
- 1 cup water
- 1 drop teal gel food coloring
- 1 drop electric blue gel food coloring
- Vanilla buttercream, store bought or homemade
- Chocolate mermaid tails
- Mermaid sprinkles
Instructions
- To make a mermaid tail cake, start by preheating your oven to 350 degrees.
- Prepare your baking pans by spraying them well with nonstick cooking spray. Set the pans aside.
- In a mixing bowl, mix together your cake mix, eggs, oil, and water until combined.
- Remove about 1 cup of cake batter into a small bowl and 1 cup into another small bowl.
- Color each small bowl of batter blue or teal, using about 1 drop of gel food color into each.
- Place the blue and teal batters into individual piping bags and set each aside.
- Pour about half of the uncolored cake batter evenly into the two prepared cake pans.
- Use the piping bags to add the colored batters, making rings on top of the plain batter.
- Add the other half of the uncolored batter on top of each pan.
- Bake the cakes for about 30 minutes in the preheated oven or until a toothpick inserted into the center comes out clean.
- Let the cakes cool for about 30-40 minutes on the counter, then place them in plastic wrap in the freezer for at least 2 hours.
- When you are ready to decorate, start by placing your first layer of cake on a cake board and topping it with a layer of buttercream.
- Place the other layer of cake on top.
- Crumb coat the cake by adding a thin layer of buttercream to the entire outside of the cake.
- Place the cake in the fridge to chill for about 10 minutes.
- Use the gel food coloring to dye about 2 cups of the buttercream blue and 2 cups of the buttercream teal.
- Use an offset spatula to spread the two colored buttercreams all around the crumb-coated cake.
- Try to create imperfect waves by using the spatula to do quick upward or diagonal strokes.
- While the buttercream is still setting, add the chocolate mermaid tails and sprinkles all around the cake.
- Place the leftover frosting in a piping bag with a 1M tip and pipe 8 rosettes around the outer part of the top.
- Top the rosettes with sprinkles and more mermaid tails and your mermaid tail cake is ready to go!

Michele Tripple is a renowned author and expert in the fields of parenting, relationships, and personal development. With her degree in marriage and family studies, her experience as a Family Life Educator, and over a decade of experience as a professional writer, Michele has authored books that provide practical advice and insights into improving family dynamics and personal growth. Her work is celebrated for its blend of research-driven information and relatable, real-world applications. Michele has been a keynote speaker at conferences and has contributed to numerous publications and media outlets, solidifying her reputation as an authoritative voice in her field and helping families build relationships.